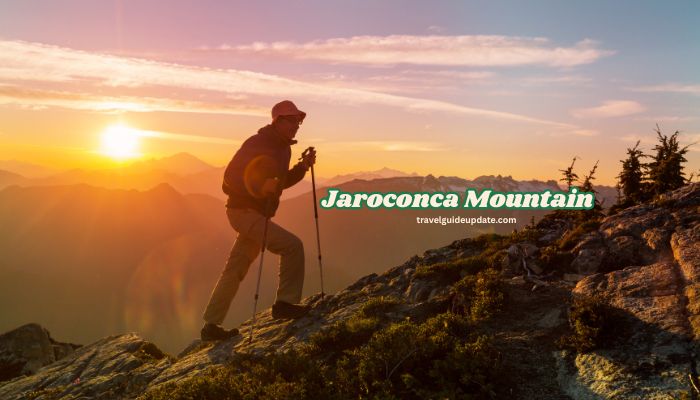
So you found Jaroconca Mountain. Good. Most people haven’t. And that’s exactly what makes it worth your time.
This peak sits deep in the Peruvian Andes, part of the Cordillera Blanca range. It rises to about 4,582 meters (roughly 15,030 feet). That’s high enough to feel in your lungs. High enough to test your legs. But not so extreme that you need years of alpine training to enjoy it.
This guide gives you the real picture. Trails, gear, seasons, wildlife, culture, and safety. No vague advice. Just what you actually need to plan a great trip.
What Kind of Mountain Is Jaroconca?
Jaroconca isn’t a gentle dome. It’s a rocky spire. Glaciers carved the north face, and you can still see the marks they left. Loose scree covers the upper slopes. One steep couloir near the top demands respect.
The mountain’s prominence is about 1,240 meters. That means it stands well above the surrounding ridges with no big neighbor to hide behind. From the summit, you get four ranges at once. Unfiltered views. Real exposure.
The geology is old. Tectonic forces shaped this area millions of years ago. The result is dramatic terrain with cliff faces, ridgelines, and deep valleys that drop sharply below you as you climb.
What the Elevation Actually Means for You?
At 4,582 meters, the air is thin. You’ll notice it. Your pace will slow. Your breathing will feel harder. Some people get headaches on day one.
Here’s a simple rule: go up slowly. Spend a night near 3,000 meters before you attempt the upper trails. Give your body two days to adjust. Drink more water than you think you need.
Temperature drops about 6°C for every 1,000 meters you climb. That means the summit can be 25–28°C colder than the base. Pack for both worlds.
The Best Trails on Jaroconca Mountain
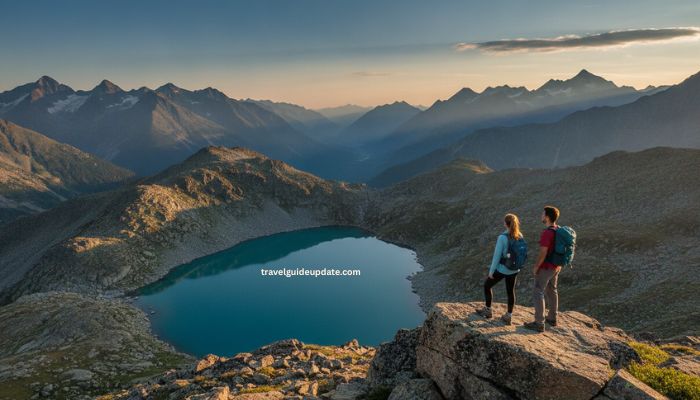
There are trails here for every level. Pick one that matches your fitness, not your ego.
Trail 1: Whispering Falls Loop (Beginner)
Distance: 3 miles | Elevation Gain: ~500 feet | Time: 2–3 hours
This is the right place to start. The path is well-marked. The terrain is forgiving. Kids as young as six finish this trail without too much fuss.
Late spring is the best time for this one. The meadows fill with wildflowers. The colors hit you at the midway point, right before the valley overlook. Bring water and a snack. It’s a half-day trip, nothing more.
Trail 2: Azure Lake Circuit (Intermediate)
Distance: 6 miles | Elevation Gain: ~1,500 feet | Time: 4–6 hours
This is where most fit beginners and intermediate hikers should aim. The loop is well-paced. The payoff at Eagle’s Perch around mile 3 is worth every uphill step. Views stretch in every direction from that point.
Keep going past the overlook. The lake at the end sits crystal clear in a natural bowl. There’s a flat rock on the north shore that’s perfect for lunch. Sit still for a minute. You’ll likely spot trout below the surface.
Tip: Start early. You want to hit Eagle’s Perch before the clouds roll in, usually around midday.
Trail 3: North Face Ascent (Advanced)
Distance: 8–10 miles | Elevation Gain: 3,000+ feet | Time: Full day
This is a serious climb. Loose scree. Steep sections. Real exposure near the top. If you haven’t done multi-day alpine hikes before, skip this one until you have.
The summit view pays back every blister. Three lakes glow at different elevations below you. One turquoise. One slate gray. One so still it looks painted. The four mountain ranges spread out in every direction.
Don’t rush the descent. More accidents happen on the way down. Take your time on the loose rock.
Trail 4: Serpent’s Spine Ridge (Multi-Day Backpacking)
Distance: 15–20 miles | Duration: 2–3 days
For experienced backpackers only. Brutal elevation changes. Remote terrain. You may go a full day without seeing another person.
Bring a physical map and compass and know how to use them. GPS fails in deep canyons. Plan your water sources before you leave. Mark them on your map.
Trail Comparison at a Glance
| Trail | Distance | Gain | Skill Level | Best For |
|---|---|---|---|---|
| Whispering Falls Loop | 3 mi | 500 ft | Beginner | Families, first-timers |
| Azure Lake Circuit | 6 mi | 1,500 ft | Intermediate | Fit hikers, day trippers |
| North Face Ascent | 8–10 mi | 3,000+ ft | Advanced | Summit seekers |
| Serpent’s Spine Ridge | 15–20 mi | Varies | Expert | Backpackers |
When to Go?: Best Seasons for Jaroconca Mountain
The mountain is open year-round. But timing matters a lot here.
April to June (Spring) is the sweet spot for most visitors. Snow from winter melts fast. Streams run full. Wildflowers cover the meadows. Weather is stable but not hot. This is the best window for beginner and intermediate trails.
July to September (Summer) brings the most hikers. Weather is reliable. Trails are dry. Summit attempts are most common in August. Expect more people on popular routes, though you’ll still find stretches of true solitude on longer trails.
October to November (Autumn) is underrated. The forest changes color. Temperatures cool. Crowds thin out fast after September. If you want great light for photos and fewer people, this is your time.
December to March (Winter) brings snow to upper elevations. Lower trails stay accessible for hardy hikers. The mountain looks stunning in winter, but most routes above 4,000 meters require crampons and winter training.
Wildlife You Can Actually See
The Andes around Jaroconca are rich with life. You just have to know where and when to look.
Andean Condor — The national bird of Peru. Wingspan up to 3.2 meters. Watch for them circling thermals between 9 and 11 AM. They rise with the warm air. Stay still at the ridge overlooks and they’ll pass close overhead.
Spectacled Bear — The only bear species in South America. Shy and mostly nocturnal. You’re more likely to spot claw marks on trees than the bear itself. Cloud forest zones near the lower trails are their territory.
Vicuña — A wild cousin of the alpaca. Fast and graceful at altitude. You’ll often see small herds on the open meadows above 4,000 meters.
Puma — Present in the region but rarely seen. You’re not in danger from them on well-traveled trails. Just don’t hike alone after dark.
Highland Birds — Andean geese, giant hummingbirds, and mountain hares all show up if you’re patient. Dawn near water sources is peak wildlife time. Go quiet. Go slow. You’ll see more.
Tip: Bring binoculars. A 10×42 pair is perfect for this terrain. Leave the big camera gear unless you’re a serious photographer. The mountain rewards patience over equipment.
What to Pack: The Real Gear List?
Don’t overpack. Don’t underpack. Here’s what actually matters.
Footwear: Broken-in hiking boots. Not new. Your feet will swell at altitude. Your ankles will twist on loose scree. Wear boots that already fit your foot shape.
Layers: Base layer (wool or synthetic), mid layer (fleece or puffy), shell (windproof and waterproof). No cotton. Ever. It soaks through and stays wet. At altitude in wind, that’s a real problem.
Water: Carry at least 2 liters. Bring a filter or purification tablets for longer routes. Streams are clean but treat them anyway.
Food: High-calorie snacks. Nuts, dried fruit, energy bars. Your body burns more at altitude than it does at sea level.
Navigation: Physical map and compass for any trail past the Azure Lake Circuit. Know how to read contour lines before you go. Don’t rely on your phone alone.
Sun protection: UV intensity is stronger at altitude. Sunscreen, sunglasses (polarized), and a hat are not optional.
First aid: A basic kit with blister care, pain relief, and altitude sickness tablets (ask your doctor before your trip about acetazolamide).
Hand warmers: Even in July, the air drops hard after sunset at elevation. Pack a few pairs. You’ll be glad you did.
Altitude Sickness: What to Know Before You Go?
This is the part most guides skip. Don’t let it be you.
Altitude sickness starts above 2,500 meters for some people. At 4,582 meters, almost everyone feels something. Common symptoms: headache, nausea, fatigue, poor sleep.
The fix is simple: go up slowly. Don’t push to the summit on your first day. Spend at least one night acclimatizing below 3,500 meters. Drink water constantly. Avoid alcohol in the first 48 hours at altitude. It makes symptoms worse.
If symptoms get severe, the only real treatment is going down. Don’t try to push through serious symptoms. Descend 300–500 meters and rest. Most people feel dramatically better within an hour.
Local Culture and Community
The villages near Jaroconca are small and welcoming. People here have been tied to this mountain for a long time.
Indigenous communities treat the peak as more than a trail destination. Ancient shrines dot several routes, especially the older paths that once served as pilgrimage routes. Small stone markers appear at key points on the ridgelines.
If you visit local villages, take time to look at the textiles. Artisans here produce handmade work using techniques passed down over generations. Buying directly from makers is one of the best things you can do for the local economy.
Homestays are available in several villages. They cost very little. They offer a lot. You’ll eat local food, hear local stories, and leave with a better understanding of where you’ve been.
Leave No Trace. This isn’t a slogan. It’s a rule here. Pack out everything you pack in. Stay on marked paths. Don’t disturb wildlife. The mountain stays unspoiled because visitors respect it. Keep it that way.
Photography Tips for Jaroconca Mountain
The mountain is a photographer’s gift. But you have to be in the right place at the right time.
Golden hour rules. The alpenglow at dawn hits the granite faces in a way that no filter can copy. Set your alarm. Be at a high point 20 minutes before sunrise.
Stay through the transition. The best shots often come five to ten minutes after you think the light show is over. Don’t pack up too fast.
Use the lakes. The still water at Azure Lake reflects the peaks perfectly on calm mornings. Get there before 9 AM for the best reflections.
For wildlife shots: Go quiet, go early, go solo or with one other person. Large groups scare animals away fast. Patience matters more than a big lens.
Winter shots: If you go in winter, the snow transforms the mountain completely. Blue sky against white peaks is some of the cleanest landscape photography you can do.
Stargazing at Jaroconca Mountain
Light pollution up here is nearly zero. That alone makes a night on the mountain worth it.
Summer nights (June through August) offer the clearest skies. The Milky Way is visible to the naked eye. The Southern Cross is sharp and bright. If you’ve never seen a truly dark sky, this will change your sense of scale.
Camp at the Azure Lake or the lower meadows for the best stargazing spots. Bring a red-light headlamp. White light kills your night vision in seconds.
Some local guides offer night hikes in summer. These are worth doing at least once. The mountain at night is a completely different place.
How to Get There and Where to Stay?
Jaroconca is not a tourist trap. Getting there takes effort. That effort keeps the crowds away.
The nearest towns serve as base camps for most hikers. Local guesthouses and small hotels cater specifically to hikers. Prices are low. Comfort is basic but clean.
Homestays in the villages closest to the mountain offer more character and better food. Arrange them through a local guide or community contact.
From the main towns, most trailheads are reachable by local transport or hired vehicle. Roads are winding and slow. Give yourself extra time for the approach.
Hire a local guide if you’re attempting the North Face Ascent or Serpent’s Spine. Not because you’re required to. Because they know the terrain in ways no map can show. They know the holds that look solid but crumble. They know where to camp. And they can spot weather changes before you see them coming.
Frequently Asked Questions
How high is Jaroconca Mountain? The peak reaches approximately 4,582 meters (15,030 feet) above sea level. The prominence is about 1,240 meters above the nearest high pass.
Is Jaroconca Mountain in Peru? Yes. It sits in the Cordillera Blanca range in the Peruvian Andes.
Do I need a permit to hike Jaroconca Mountain? Permit requirements can vary by season and specific trail. Check with local guide services or the nearest ranger station before your trip. Requirements do change.
Is Jaroconca Mountain good for beginners? Yes. The Whispering Falls Loop is a great beginner trail. The Azure Lake Circuit works for anyone in decent shape. Stay off the North Face Ascent until you have real mountain experience.
What is the best time of year to visit? April through October is the most reliable window. April to June gives you wildflowers and stable weather. August is peak hiking season. October offers autumn colors and fewer people.
Can kids hike Jaroconca Mountain? Yes, on the beginner trail. Children six and older can handle the Whispering Falls Loop with adult supervision. The upper trails are not suitable for young children.
How do I avoid altitude sickness? Ascend slowly. Drink plenty of water. Spend at least one night acclimatizing below 3,500 meters before pushing higher. Talk to your doctor about altitude medication before you go.
Is it safe to hike Jaroconca Mountain alone? Lower trails are fine solo. The North Face Ascent and multi-day routes are safer with a partner or local guide. Always leave your itinerary with someone who knows when to expect you back.
What wildlife might I see? Andean condors, spectacled bears, vicuñas, pumas, mountain hares, highland birds. Dawn near water sources is the best time for sightings.
Are there camping spots on Jaroconca Mountain? Yes. The Azure Lake area and lower meadows are popular camping spots. Follow local guidelines. Pack out all your waste. Check if fires are permitted before you light one.
How long does it take to hike to the summit? The North Face Ascent takes a full day. A very early start is essential. Most hikers begin before sunrise and return to base camp by late afternoon.
Is Jaroconca Mountain crowded? No. That’s one of its biggest draws. Even in peak season, you can spend long stretches of trail completely alone. The longer and harder routes see very few people at all.
Conclusion
Jaroconca Mountain is more than just a hiking destination—it’s a place where breathtaking landscapes, challenging trails, unique wildlife, and rich Andean culture come together to create an unforgettable adventure. Whether you’re exploring a beginner-friendly path, aiming for the summit, or spending a night beneath a sky full of stars, careful planning and respect for the mountain will make your journey both safe and rewarding. Pack wisely, acclimatize properly, and leave no trace so future travelers can enjoy the same untouched beauty that makes Jaroconca Mountain such a remarkable destination.